
A CI/CD Pipeline for Your Static Website
Motivator for CI/CD Pipelines
In the early stages of product development, deploying from the local workstation can make sense as it offers the agility to rapidly test ideas. However, as the product or service transitions towards a more production-like state, latest when the number of team members involved expands, it’s time to think about automating and centralizing the deployment process. This is where setting up a Continuous Integration/Continuous Deployment (CI/CD) pipeline becomes crucial.
But also for small personal projects an automated CI/CD pipeline has some advantages. For me a pro is not being forced to remember all the steps to deploy and be able to use the limited brain capacity for other stuff. 😛
The Scenario
So I took my running example of a HUGO JAMStack static S3-based website first introduced in this post and tried to come up with an effective way to automate the deployment somewhere remote loose from the dependencies on my laptop (capacity, OS-specifics, installed libraries, etc.). I used GitLab for that.
What else is out there?
Doing some research in advance, I encountered several public projects that address a similar need: Smigle Hugo Theme, or GatsbyJS GitLabCI for Clients. These examples offer alternative solutions suitable for similar use cases, outsourcing the actual deployment to target infrastructure such as Vercel or Netlify.
However, it seems to be lacking a comprehensive project that encompasses the full stack, including infrastructure automation on a prominent hyperscaler (e.g. AWS, Azure, GCP, etc.), combined with a CI/CD pipeline setup. So, I decided to share my own approach where used AWS. Let’s dive in!
Target Audience and Pre-requisites
If you are a developer, (DevOps) engineer, or hobby builder in the middle of setting up or learning how to set up a static website, this post is for you. 🫵 However, in order to follow through, you should have some basic knowledge about the following topics:
- Public Cloud Providers a.k.a Hyperscalers (e.g. AWS, Azure or similar)
- The basic principle behind “Infrastructure-as-Code” (IAC)
- Static website generators a.k.a. JAMstack (e.g. HUGO, Gatsby, etc.)
Tools and Platforms
In our example we will utilize a powerful feature offered at GitLab.com called Gitlab CI/CD. Alongside Git version control we will leverage the free tier runner agent capacity. This enables us to assemble the CI/CD pipeline and orchestrate the different stages; namely the interplay between automating the infrastructure and building and deploying the application (the HUGO content side), as well as structuring the pipeline into different jobs and stages so that these things happen in the right order. In essence, GitLab serves as the central platform for code versioning and CI/CD tasks, bringing together all work threads from infrastructure and application. As an alternative platform we could have used Github Actions.
In addition to GitLab, our tool stack includes:
-
Pulumi: An IAC tool that we use to automate the infrastructure configuration. It conducts the service provisioning in our AWS account and deployment of the static content to the S3 Bucket. Potential alternatives to Pulumi include Terraform, Bizeps, AWS CDK, etc.
-
HUGO: The JAMstack framework that we use to build the “application”, in our case the static website. Alternatives are e.g. Jekyll, Gatsby, etc.
-
AWS: The infrastructure provider. We use S3 to host the static website and CloudFront for the Content Delivery. More details again in this post.
The Big Picture

The diagram shows the connection and interactions between the different tools and platforms.
A commit and git push action from the developer to the remote GitLab Repository triggers a CI/CD pipeline on GitLab, as defined by the so called .gitlab-ci.yml-file in the repository. It holds all information to configure the pipeline. The file defines jobs that the GitLab CI/CD Runner will execute in a defined order. One could also think of it as an executable installation guide that you would document in your README.md. Instead you following the commands explained in the readme, the runner does it for you every time the pipeline runs.
Once authenticated against AWS, the pipeline can perform actions within the authorized AWS account, namely deploying and configuring the cloud resources required to publish the website and provide the content to the users.
In the remainder of this post, we will focus on the stuff that happens in the GitLab pipeline (left side of the diagram). Let’s go through it from the top. We have three stages: build, dry-run, and deploy defined in the yaml like this:
stages:
  - build
  - dry-run
  - deploy
This is how the pipeline looks in the GitLab Browser GUI once it has run through all stages ✅ ✅ ✅:
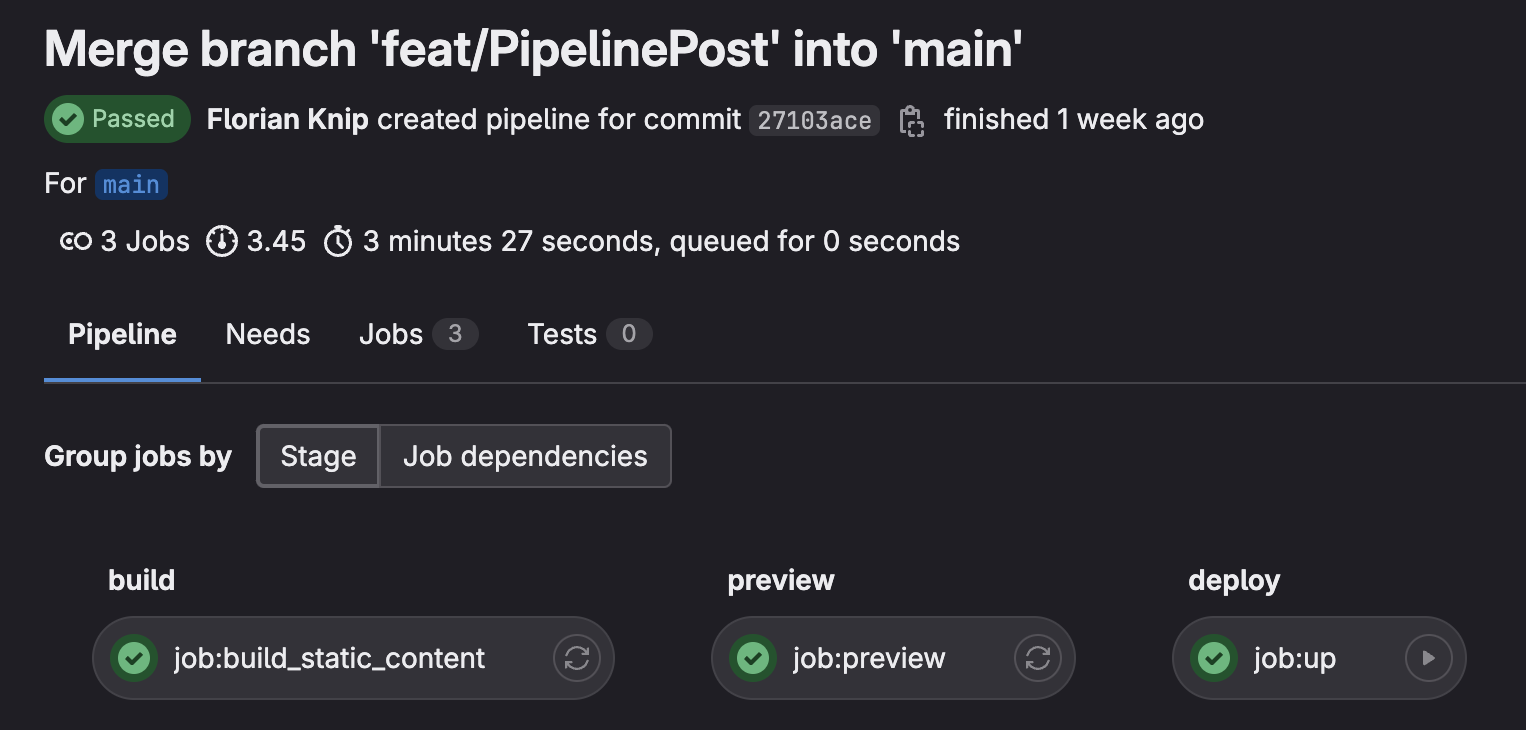
Marcin explains the concept of pipelines, stages, and jobs well in his Medium post. In case you would like to familiarize with Gitlab CI/CD terminology I would recommend it as a read. For the purpose of this post, it is enough to understand that we separated the pipeline into three stages that depend on each other. The next stage can only start once the previous one has successfully finished.
In our case, the pipeline is structured to first automate the process of building the static content with HUGO (build stage). If the build succeeds, the built artifact is made available for the jobs in the next stage. The job in the dry-run stage takes the static content in the artifact and previews the changes. That includes both changes to the static content like HTML files, and CSS files in the S3 bucket, as well as changes to the underlying infrastructure itself, e.g. DNS configuration. Finally - if the jobs in the two previous stages went fine - the deploy stage applies those changes to an AWS environment.
Now you might already ask: What about some tests, or a test stage? The answer: You are right! We should have that in there. We will get back to this. For now, let’s focus on the three stages.
Global variables
Before the pipeline can run for the first time, we need to make sure to feed in all the required information. This is were the variables come in. They not only ensure that the YAML file is filled with the required details, but they also enhance its modularity and reusability.
The placeholder “<your-project>” should be replaced with the actual name of your project, or website. Also note the the HUGO theme from vaga/hugo-theme-m10c. from running example shows up as a variable here that can be overriden.
Disclaimer: While I haven’t tested this with other HUGO themes and are far away from considering myself as an HUGO expert, in theory, it should work with any other HUGO theme that follows a similar structure."
variables:
  # Default HUGO version. This can be changed in GitLab's CI/CD variable settings if necessary.
  HUGO_VERSION: "0.111.3"

  # Name of the HUGO theme to use. Default is m10c, but can be overridden.
  HUGO_THEME_NAME: m10c

  # GitHub username of the theme's author.
  THEME_AUTHOR: "vaga"

  # This variable specifies the path to the Hugo site.
  HUGO_PATH: "$CI_PROJECT_DIR/hugo-site"

  # Name of the S3 bucket for Pulumi backend. Replace <your-project> with your project name.
  STATIC_CONTENT_S3_BUCKET:  <your-project>-pulumi-backend

  # Name your Pulumi stack. Pulumi deploys infrastructure on a `stack`. To get an in depth understanding please consult this page https://www.pulumi.com/docs/concepts/stack/
  PULUMI_STACK_NAME: "dev"

  # The name of folder in the bucket where the websites static content will be stored.  Keep in the sync with the `pathToWebsiteContents`` value that you define in the pulumi project settings
  PUBLIC_CONTENT_FOLDER: "public"

  #  AWS region where the pulumi backend is located. Default can be overridden with any value from the list of regions: https://docs.aws.amazon.com/AmazonRDS/latest/UserGuide/Concepts.RegionsAndAvailabilityZones.html#Concepts.RegionsAndAvailabilityZones.Regions
  AWS_REGION: eu-central-1

  # This variable specifies the name of the content artifact.
  CONTENT_ARTIFACT: "public-content-$CI_COMMIT_SHORT_SHA"
Build Stage
In the build stage, we have the repository with the content (posts and images) already checked out on the file system of the GitLab runner, but we need to download the HUGO theme, then compile the static content of the site using the HUGO CLI. If successful the compiled content gets zipped and stored as an artifact in GitLab:
job:gen_static_content:
  image: debian:latest
  stage: build
  rules:
    - if: '$CI_COMMIT_BRANCH == "main" || $CI_PIPELINE_SOURCE == "merge_request_event"'
    - changes:
        - "**/*"
        - "!*.md"
  before_script:
    - apt-get update -qy && apt-get install -y wget unzip zip git
    # Download and install Hugo
    - wget https://github.com/gohugoio/hugo/releases/download/v${HUGO_VERSION}/hugo_extended_${HUGO_VERSION}_Linux-64bit.tar.gz
    - tar -xzf hugo_extended_${HUGO_VERSION}_Linux-64bit.tar.gz
    - mv hugo /usr/local/bin/hugo
    - hugo new site $HUGO_PATH
    - cd $HUGO_PATH
    # Clone HUGO theme
    - git clone https://github.com/$THEME_AUTHOR/hugo-theme-$HUGO_THEME_NAME.git themes/$HUGO_THEME_NAME
  script:
    - |
      echo "Copying content, images, and HUGO configuration to the required locations..."
      cp -r ./../content/ ./
      cp -r ./../images/ ./themes/${HUGO_THEME_NAME}/assets/
      cp -r ./../config.toml ./
      cp -r ./../favicon.ico ./static/
      cp -r ./../avatar.jpg ./static/
    # Compile Hugo and generate public content
    - hugo --cleanDestinationDir
    # Create zip file with public content
    - zip -r "$CI_PROJECT_DIR/${CONTENT_ARTIFACT}.zip" "${HUGO_PATH}/public/"
  artifacts:
    paths:
      - "${CONTENT_ARTIFACT}.zip"
    expire_in: 1 day
Dry-Run Stage
In the preview stage we can “dry-run” the deployment. Like all other stages, this is triggered with every push of a committed source code change in the repository. The Dry-Run stage enables us to see and review what will happen without letting it actually happen. This is done with the “pulumi preview"-command. In simple terms, it takes your code changes, generates a new desired state from that and compares it against the existing world in AWS.
Before it can do that, we need to first install the dependencies such as Pulumi, AWS CLI, and NodeJS runtime in a before_script.
Then it downloads the zipped artifact from the previous build job, and finally shows the upcoming changes as the part the runner’s job output in the Gitlab GUI.
But how does the runner agent get authorization to access the resources in the AWS account? We use the GitLab OIDC (OpenID Connect) token to build a trust relationship between AWS and Gitlab. Using Gitlab’s OIDC has the major advantage that we can use temporary AWS credentials which is considered a more secure way of authenticating with AWS in contrast to permanent credentials.
job:preview:
  stage: dry-run
  needs: ["job:gen_static_content"]
  image:
    name: "amazonlinux:2023"
    entrypoint: [""]
  id_tokens:
    GITLAB_OIDC_TOKEN:
      aud: https://gitlab.com
  variables:
    NODE_VERSION: "20.x"  # Define Node version as an environment variable
  before_script:
    # Install dependencies
    - export PATH=$PATH:$(pwd)/scripts/cicd:~/.pulumi/bin
    - chmod +x ./scripts/cicd/*.sh  # Make all scripts executable
    - install_node.sh $NODE_VERSION
    - update_centos.sh
    - install_pulumi.sh
    - install_aws_cli.sh
    # Login to target AWS account
    - >
      export $(printf "AWS_ACCESS_KEY_ID=%s AWS_SECRET_ACCESS_KEY=%s AWS_SESSION_TOKEN=%s"
      $(aws sts assume-role-with-web-identity
      --role-arn ${GITLAB_DEPLOYMENT_ROLE_ARN}
      --role-session-name "GitLabRunner-${CI_PROJECT_ID}-${CI_PIPELINE_ID}"
      --web-identity-token ${GITLAB_OIDC_TOKEN}
      --duration-seconds 3600
      --query 'Credentials.[AccessKeyId,SecretAccessKey,SessionToken]'
      --output text))
  script:
    # download public content from previous job
    - unzip $CONTENT_ARTIFACT.zip && mkdir -p ./infrastructure/public && cp -r ./$HUGO_PATH/public ./infrastructure/
    # build the pulumi project
    - cd ./infrastructure/
    - yarn
    # login to Pulumi backend
    - export PULUMI_CONFIG_PASSPHRASE=$(echo $PULUMI_CONFIG_PASSPHRASE_BASE_64_ENCODED | base64 -d)   # GitLab does not allow special chars in masked vars. There need to store in base64 and decode for usage
    - pulumi login s3://$PULUMI_BACKEND
    - pulumi stack select $PULUMI_STACK_NAME
    # preview the changes
    - pulumi preview
  dependencies:
    - job:gen_static_content
Deploy Stage
Here we deploy the full stack (meaning the infrastructure + the website content) to the target environment. Note that in the deploy stage the job looks exactly the same except in the last command with the “pulumi up"-command, we actually deploy the changes to the target AWS environment.
    ...
    # deploy the changes
    - pulumi up -y
    ...
Congrats! 🥳 You successfully build a CI/CD pipeline for automatically deploying a static website to AWS.
To view the full source code check out the project repository on GitLab.
Limitations
Is this CI/CD pipeline foolproof? Certainly not. It’s essentially a minimum viable product (MVP) with several components yet to be added. Coming back to the question about unit testing: There should be unit/integration testing jobs in place in each stage before going to the next one.
Overall the post packs a substantial amount of information into a brief read. Therefore, please also have a look at the public repo that contains the full source code for this blog post to get a better understanding of the details. We need to keep in mind that some arrangements in the repository were tailored to illustrate specific points in this post and may not be suited as a production-ready project templates.
Summary & Conclusion
We have explored how to set up a CI/CD pipeline for automatically deploying a static S3-based website to AWS using GitLab, and Pulumi. We have seen how to define the pipeline stages with the three stages build (1), dry-run (2), and deploy (3). Further we used GitLab OIDC tokens to authenticate against AWS in a modern security best-practice way in order to conduct the deployment.
Overall, this pipeline provides a way to start deploying your own static website project, reducing the manual effort by moving the whole deployment process away from your local workstation to a central pipeline solution.
In the introduction section, I referred to the lack of examples doing the full stack, including infrastructure automation on a hyperscaler like AWS. I found this quite surprising as it seems like a natural fit to me rather than a special interest case. So I might have missed something either during my online research or in my understanding of the overall topic compared to the how the community sees it. If you know of any other examples, feel free to reach out and let me know. I would be happy to learn about it.